

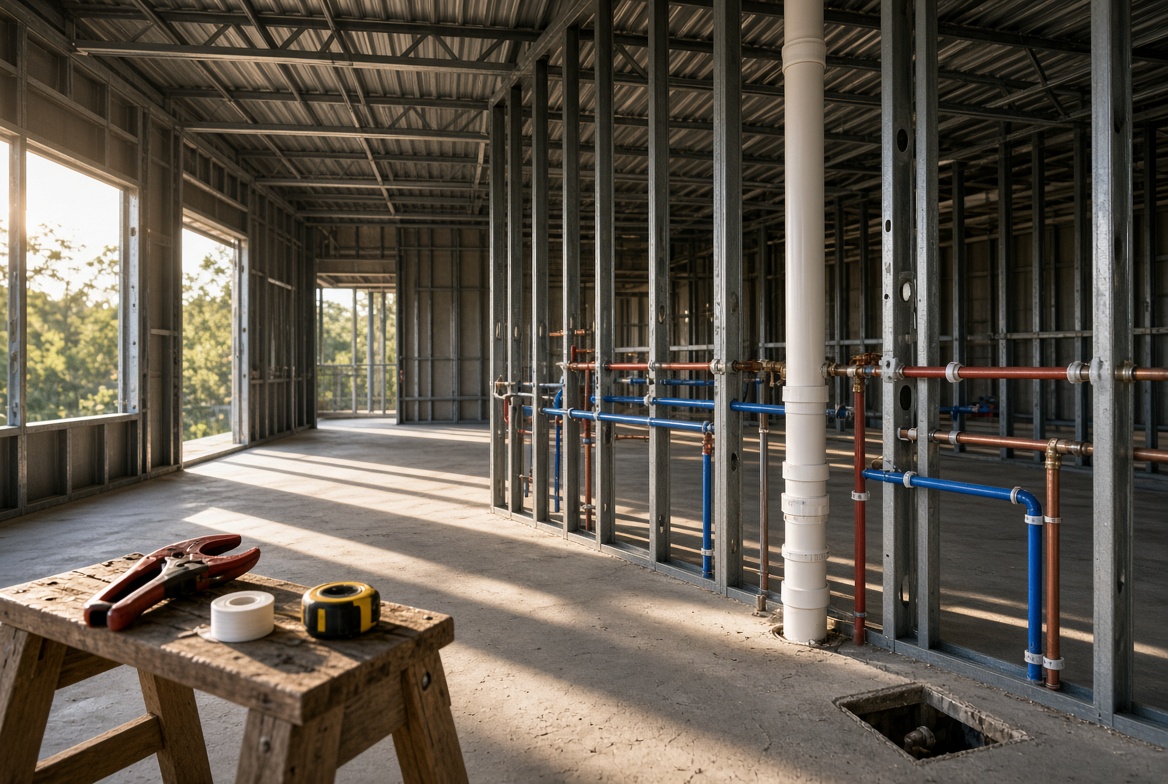
Plumbing rough-in is the phase where every drain, vent, and supply line gets locked in before the walls close up — and on a barndominium, it’s the trade that goes first, not last. Get the sequencing, the well-and-septic tie-ins, or the steel-specific penetration details wrong here, and you’re either cutting into finished walls later or waiting on a failed inspection. This checklist covers every line item, in the order your inspector actually checks it.
Quick Answer: Barndominium Plumbing Rough-In
Plumbing rough-in covers drain-waste-vent (DWV) piping, supply lines, and any well or septic connections — all installed before drywall goes up. For a 2,000 sq ft barndominium with 2 full baths and a kitchen, rough-in plumbing alone runs $8,000–$15,000. Add fixtures and a water heater and you’re at $13,800–$31,500 on municipal water, or $22,300–$60,500 if you’re drilling a well and installing a septic system — which describes most rural barndominium builds.
| Line Item | Typical Cost |
|---|---|
| Rough-in plumbing (2 baths, kitchen) | $8,000–$15,000 |
| Fixtures (toilets, sinks, showers) | $2,500–$8,000 |
| Water heater (tank or tankless) | $800–$2,500 |
| Well and pump system (rural, no municipal) | $5,000–$15,000 |
| Septic system | $6,000–$20,000 |
Why Plumbing Goes First
On a barndominium rough-in, trades work in a fixed order: plumbing, then HVAC, then electrical. Drain and vent lines are the largest, heaviest, and least flexible systems in the building — a 3- or 4-inch DWV stack has almost no room to bend around an obstacle, and it has to maintain slope the entire run. Because of that, plumbing claims its space first, and every other trade routes around it.
This matters most at the slab. Your under-slab plumbing — drain lines, the main stack location, any tub or shower drains — has to be finalized and inspected before concrete gets poured. There’s no going back once that slab cures. If your plumber is still finalizing fixture locations the week of the pour, you’re building on a guess.
Steel-Building-Specific Plumbing Considerations
Plumbing in a steel barndominium uses the same fixtures and mostly the same code as a stick-built house, but a handful of details are genuinely different because you’re working inside a metal envelope.
Vent stack roof penetrations
Every plumbing vent stack has to penetrate the roof, and on a standing seam or exposed-fastener metal roof, that penetration is a different animal than an asphalt shingle boot. You need a pipe flashing designed for metal roofing — typically a retrofit or EPDM boot rated for the specific panel profile — installed before the roofer moves past that section. Coordinate this with your roofing sub directly; a generic shingle boot will leak on a metal roof within a season.
Freeze protection near exterior steel walls
Steel wall panels conduct cold far more aggressively than wood siding. Supply lines run in an exterior wall cavity behind steel panels are at higher freeze risk than the same run behind vinyl or brick, especially before insulation is in place. In colder climates, route supply lines through interior walls wherever the floor plan allows, and flag any unavoidable exterior-wall runs to your insulation contractor so they get full coverage, not just a token pass.
Pipe penetrations through steel framing
Like electrical wire, plumbing lines routed through steel studs need to be protected from the sharp punched edges of the framing — grommets or bushings at every penetration point, same as the electrical rough-in. It’s an easy detail to miss when you’re focused on slope and fixture locations, but inspectors check it on the plumbing pass too.
Well and Septic Tie-In Items
This is the section most plumbing checklists skip entirely, because most plumbing checklists are written for houses on municipal water and sewer. If you’re building rural — which describes most barndominium sites — these items belong in your rough-in plan, not as an afterthought.
- Septic layout finalized before slab pour — the tank and drain field location determines where your main stack can exit the building. Get your septic design finalized and permitted before your plumber sets under-slab drain lines.
- Well pump sizing tied to fixture count — a well pump sized for a 2-bath house won’t keep up with a 3-bath house with a soaking tub. Confirm pump and pressure tank sizing against your final fixture list, not an early estimate.
- Backflow prevention at the well connection — most counties require a backflow preventer where the well feeds the house, especially if you’ll ever connect a hose bib to livestock troughs or irrigation. Check your county’s requirement before rough-in, not at final inspection.
- Distance and slope requirements between well and septic — most health departments enforce a minimum separation between your well and your septic drain field. This should already be locked in from your site plan, but verify it before your plumber breaks ground on either system.
The EPA’s septic systems resource hub is a solid starting point for how these systems actually work, and WellOwner.org covers private well construction and maintenance in more depth than most contractors will walk you through.
Get the full plumbing rough-in checklist, free
This page covers the highlights. The free Rough-In Checklist has the complete line-by-line list — DWV, supply, well and septic tie-ins, and the steel-specific items — sequenced in the order your inspector checks them.
Prepping for the Plumbing Inspection
Most jurisdictions require two plumbing inspections before drywall: a DWV test and a supply line pressure test. Here’s what trips up first-time owner-builders at each:
- DWV air or water test not holding — your drain and vent system gets pressurized (air) or filled (water) and has to hold for a set period. A failed test usually means a loose fitting or an unglued joint — have your plumber walk every joint before the inspector arrives.
- Supply lines not pressure tested — supply piping gets tested separately, typically with air or water at a specified PSI held for a set time. Don’t let your plumber skip this to save a trip; a slow leak behind drywall is a much more expensive problem to find later.
- Cleanouts not accessible — every DWV system needs cleanouts at specific intervals, and they have to remain accessible after finish work. A cleanout buried behind a future built-in is a code violation waiting to be discovered.
- Vent stack terminations too close to windows or doors — plumbing vents have to terminate a minimum distance from any opening that can be operated, to keep sewer gas away from living space. Check this against your actual window and door locations, not just the plan set.
Walk the rough-in with your plumber before either inspection. Catching a loose joint or a buried cleanout yourself costs you five minutes; catching it at inspection costs you a rescheduled visit and a delayed slab or drywall date.
The complete pre-drywall system
The free checklist covers the essentials. The Rough-In Pack goes further — 88 line items across electrical, plumbing, and HVAC, sequenced in inspection order, plus sub-hiring question sheets so you know what to ask before you sign a contract with your plumber.
Frequently asked questions
How much does plumbing rough-in cost for a barndominium?
Rough-in plumbing for 2 baths and a kitchen typically runs $8,000–$15,000, not including fixtures ($2,500–$8,000) or a water heater ($800–$2,500). On municipal water and sewer, total plumbing costs land between $13,800 and $31,500. On a well and septic system, which is typical for rural barndominium sites, total costs run $22,300–$60,500.
Why does plumbing rough-in happen before electrical?
Drain and vent lines are the largest, least flexible systems in the building and have to maintain a consistent slope, so they get first claim on the available space in walls and under the slab. Electrical wire is the most forgiving system and can route around almost anything, so it goes last, after plumbing and HVAC have already claimed their paths.
Does my septic system need to be designed before rough-in plumbing starts?
Yes. Your septic tank and drain field location determine where your main drain stack can exit the building, which affects your under-slab plumbing layout. Finalize and permit your septic design before your plumber sets any under-slab drain lines, ideally before the slab is poured.
What plumbing inspections happen before drywall on a barndominium?
Most jurisdictions require a DWV (drain-waste-vent) test, where the system is pressurized with air or filled with water and has to hold for a set period, and a separate supply line pressure test. Both need to pass before drywall goes up, since both systems become inaccessible once the walls close.
Do plumbing lines need special protection running through steel studs?
Yes, the same way electrical wire does. Pipes routed through holes in steel studs need grommets or bushings covering the sharp punched edges to prevent long-term wear or damage to the pipe. This is a detail inspectors check on the plumbing rough-in pass as well as the electrical pass.
Planning your full rough-in? See the electrical rough-in guide for the sequencing that follows plumbing, the land and septic siting guide for evaluating rural parcels, or use the financing estimator to see how these costs fit your overall budget.
We plan on completing 3 rooms first (bedroom, bathroom and kitchen), so that we can live in our barndo while completing the rest of the house. How common is that method? What issues should we consider with this method? Will this method increase the price of our final build?
Hi Fabulous,
Great question! That approach is called a phased build. It can work, though we don’t have reliable numbers on how common it is among barndo owners. The key is planning the whole house upfront, even if you finish it in stages.
A few things to consider:
Move-in approval: Check with your local building department before committing to this plan. A finished bedroom, bathroom, and kitchen won’t automatically make the home approved for occupancy. Ask whether temporary or partial occupancy is allowed and which inspections and systems must be completed first.
Construction separation: Plan how you’ll keep dust, fumes, tools, and construction traffic out of your living space while maintaining safe exits. Noise and utility interruptions also get tiring when you’re living onsite!
Future work: Have your builder plan plumbing, electrical, and HVAC for the final layout so later work doesn’t require tearing into finished rooms.
Financing and insurance: Confirm that your lender and insurer will accommodate both the phased schedule and living there before the entire build is complete.
Will it increase the final cost? It can. Repeat contractor visits, temporary barriers, protecting finished areas, and rework can add expense. On the other hand, moving in earlier may reduce rent or other temporary housing costs. Phasing can spread out spending without necessarily lowering the total build price.
We’d ask your builder for two estimates using the same finished design: completing everything at once versus completing it in phases. Compare those alongside potential housing savings.
What state and county are you building in, and will you be doing the remaining work yourselves?